This means my sail will no longer be stored outside as the flag is permanently attached to the sail. Well as permanent as duct tape. No tape on the flag though! I also spruced up the mast step a bit.
Now is the time for the dreaded bits and painting. I'll be varnishing the inside for a more traditional look and I'm excited to get that started. But I'm off to Idaho for a few days so I'll be boat free for a bit.
Sunday, August 29, 2010
Little Bit O' Work
It was a relatively short and quite day. Experimented with a boom on my spirit sail. Excessive boom rise but I'll keep at it. I do like the spirit sail for it's simplicity and ease of set up. One thing I need to remember is this is a SMALL boat and should be treated as such. I draw inspiration from the Ensigns Gig a two sheeter I found at Duck Works. I am a patriot. So today I raised Old Glory above the deck of the S/V Sea Hawk.
Friday, August 27, 2010
Boat Camping Wish List
Don't think I'll get any boat work done today so I thought I'd post one one of my favorite topics, Boat Camping. The allure of heading out on a local lake and going from spot to spot for a few days has really fired my imagination. Last night it was waiting out a rain storm, who knows what it will be tomorrow! But I thought I'd throw up a wish list of gear. Now it should be noted that this is not everything and just what my rather uniformed mind would like. But for those of you wondering, here is my list:
-Bivy Sack
A must for boat camping. Near as I can understand it's a one man tent that could be set up IN my boat. How cool is that? I figure I'll carry a full tent for shore excursions but if I'm on the boat for the night it seems to make sense. It'll need to be waterproof and had a good price. And I'd like a full bivy, not just a "shelter". A one man tent may fit the bill. But it is my plan to ask for a bivy for Christmas.
-Camp Stove
Again an essential if I want to eat more then Cliff Bars and trail mix. Okay I'm reaching a bit there but having a couple of sizzling sausages in the morning while I watch a hunting Great Blue Heron while sipping a mug of hot chocolate seems like it's the way to go. Or turning plump freshly caught trout with the blade of my boat knife while I wait to for my tea to boil. Will it happen? Who knows but this is all in my mind at the moment. Something small and one burnery I think. Or an old battleship Coleman two burner. I think in my future boat I'll have the room for one of the green monstrosities, I grew up with them so I have no doubt one would continue to serve me well.
-New PFD
I have one and would never imagine sailing a small boat without it. But I would like a new one. A PFD that gives me more room to move and doesn't break the bank. I've been looking at kayaking vests and they may fit the bill. Will need to hit my local REI to ask questions and find a good one. But I think for extending sailing my current PFD will be better left as a back up or emergency floatation.
-GPS
A back up to my tennis ball log and compass. Not a necessity but it would be nice to have. Something rugged and inexpensive. I don't want a $400 dollar unit on my local lakes. If I ever move or journey father afield a full featured GPS would be the order of the day. But right now, it's not.
-Marine Compass
This is a must for any kind of navigation. I'd prefer the marine type. If I can get one in a binnacle all the better but I can forsake fomanticism for functionality.
-Spy Glass
Because I want one dammit!
-Binoculars
Because it's smart. And a good pair will last forever.
-Marine/Weather Radio
This one is also a must. I can call for help and keep track of my local weather. 'nuff said.
Foul Weather Gear
-Because not having it in the great state of Montana for any sort of outdoor activity is just plain stupid. And if I get one the odds are it won't rain because I have it.
Well there you have my current want list All the items can be found on Amazon for less then $100 and if you'd like to send me stuff, go right ahead. I'm off to live vicariously through others blogs. I can smell the campfire now!
-Bivy Sack
A must for boat camping. Near as I can understand it's a one man tent that could be set up IN my boat. How cool is that? I figure I'll carry a full tent for shore excursions but if I'm on the boat for the night it seems to make sense. It'll need to be waterproof and had a good price. And I'd like a full bivy, not just a "shelter". A one man tent may fit the bill. But it is my plan to ask for a bivy for Christmas.
![]() |
| Lightsabre Bivy by Black Diamond |
-Camp Stove
Again an essential if I want to eat more then Cliff Bars and trail mix. Okay I'm reaching a bit there but having a couple of sizzling sausages in the morning while I watch a hunting Great Blue Heron while sipping a mug of hot chocolate seems like it's the way to go. Or turning plump freshly caught trout with the blade of my boat knife while I wait to for my tea to boil. Will it happen? Who knows but this is all in my mind at the moment. Something small and one burnery I think. Or an old battleship Coleman two burner. I think in my future boat I'll have the room for one of the green monstrosities, I grew up with them so I have no doubt one would continue to serve me well.
![]() |
| Coleman Fold n' Go Instastart 2 Burner Stove |
-New PFD
I have one and would never imagine sailing a small boat without it. But I would like a new one. A PFD that gives me more room to move and doesn't break the bank. I've been looking at kayaking vests and they may fit the bill. Will need to hit my local REI to ask questions and find a good one. But I think for extending sailing my current PFD will be better left as a back up or emergency floatation.
![]() |
| Extrasport Eagle Type III PFD |
-GPS
A back up to my tennis ball log and compass. Not a necessity but it would be nice to have. Something rugged and inexpensive. I don't want a $400 dollar unit on my local lakes. If I ever move or journey father afield a full featured GPS would be the order of the day. But right now, it's not.
![]() |
| Garmin eTrex H Handheld GPS |
-Marine Compass
This is a must for any kind of navigation. I'd prefer the marine type. If I can get one in a binnacle all the better but I can forsake fomanticism for functionality.
![]() |
| Tr-31Gclm by Ritchie |
Because I want one dammit!
![]() |
| Tesco Specialty 25x30mm Brass Spyglass |
Because it's smart. And a good pair will last forever.
![]() |
| NcStar BA1050R 10x50 Full Size Binoculars |
-Marine/Weather Radio
This one is also a must. I can call for help and keep track of my local weather. 'nuff said.
![]() |
| Cobra MR HH125 Compact Waterproof Marine Handheld Radio |
-Because not having it in the great state of Montana for any sort of outdoor activity is just plain stupid. And if I get one the odds are it won't rain because I have it.
![]() |
| Coleman PVC/Nylon Rain Suit |
Well there you have my current want list All the items can be found on Amazon for less then $100 and if you'd like to send me stuff, go right ahead. I'm off to live vicariously through others blogs. I can smell the campfire now!
A Day of Work
![]() |
| The year is 1905 and Seitz Boat Yard and Print Shop is running two shifts. |
![]() |
| S/V Pica enjoying her new bottom. |
On a previous entry I made mention of the idea that changing the plans kills kittens and cuts off your fingers. I should clarify after our session today. There is a huge difference between changing the plans for the sake of changing the plans room to set them "right" again. I'm sure The Typesetter can cover what is and is not changed but we're, that is HE, is gong about it right. How those decisions are arrived at is not as important. What is important that a lot of thought and banter goes into these decisions. For myself I'm building a boat vicariously and it's a blast. It's nice to to see how my Mayfly will get together and after watching this boat I'm pleased to say it'll be quick and painless. I hope. but I know I can count on a good friend to help me. Because he'll have another boat to build. Even if he doesn't know it yet.. So I'll end with some photo's taken during the build today. You can see how the boat is coming along well, the creation of the new mast step and partner and a man building a boat to get away from it all. Doing a pretty good job of it I think.
Wednesday, August 25, 2010
Es hält Wasser von Gott!!!
S/V Sea Hawk does indeed hold water! But we'll get to that in a second. The hardest part of building a boat is the very end. Where all the bits are going on and it's tough to find a direction to go in. My way of getting past this is to work on the boat until decent progress is made every morning. And I have fulfilled that requirement for today.
The plan for the Cygnet calls for a whimsical duck shaped rudder. If I were to show up on a wharf in Hong Kong with a rudder like this I'd have the tar kicked outta me by wharf rats. A ducky rudder will simply not do. So I decided I'd make it like I have everything else, I'll guess.
First up was the top part of the folding rudder. I got a pencil and drew out what I think it will look like. Then I cut it out. Now I'm using 1/4" luann so I'll laminate it for a full 1/2".
If the lamination fails I'll simply these bits out of full 1/2" plywood and call it a day. With that sorted out it was on to the rudder. Yes, I am still fascinated by Titanic's rudder so I made one that looks like that. Much bigger and broader then my last one mind you.
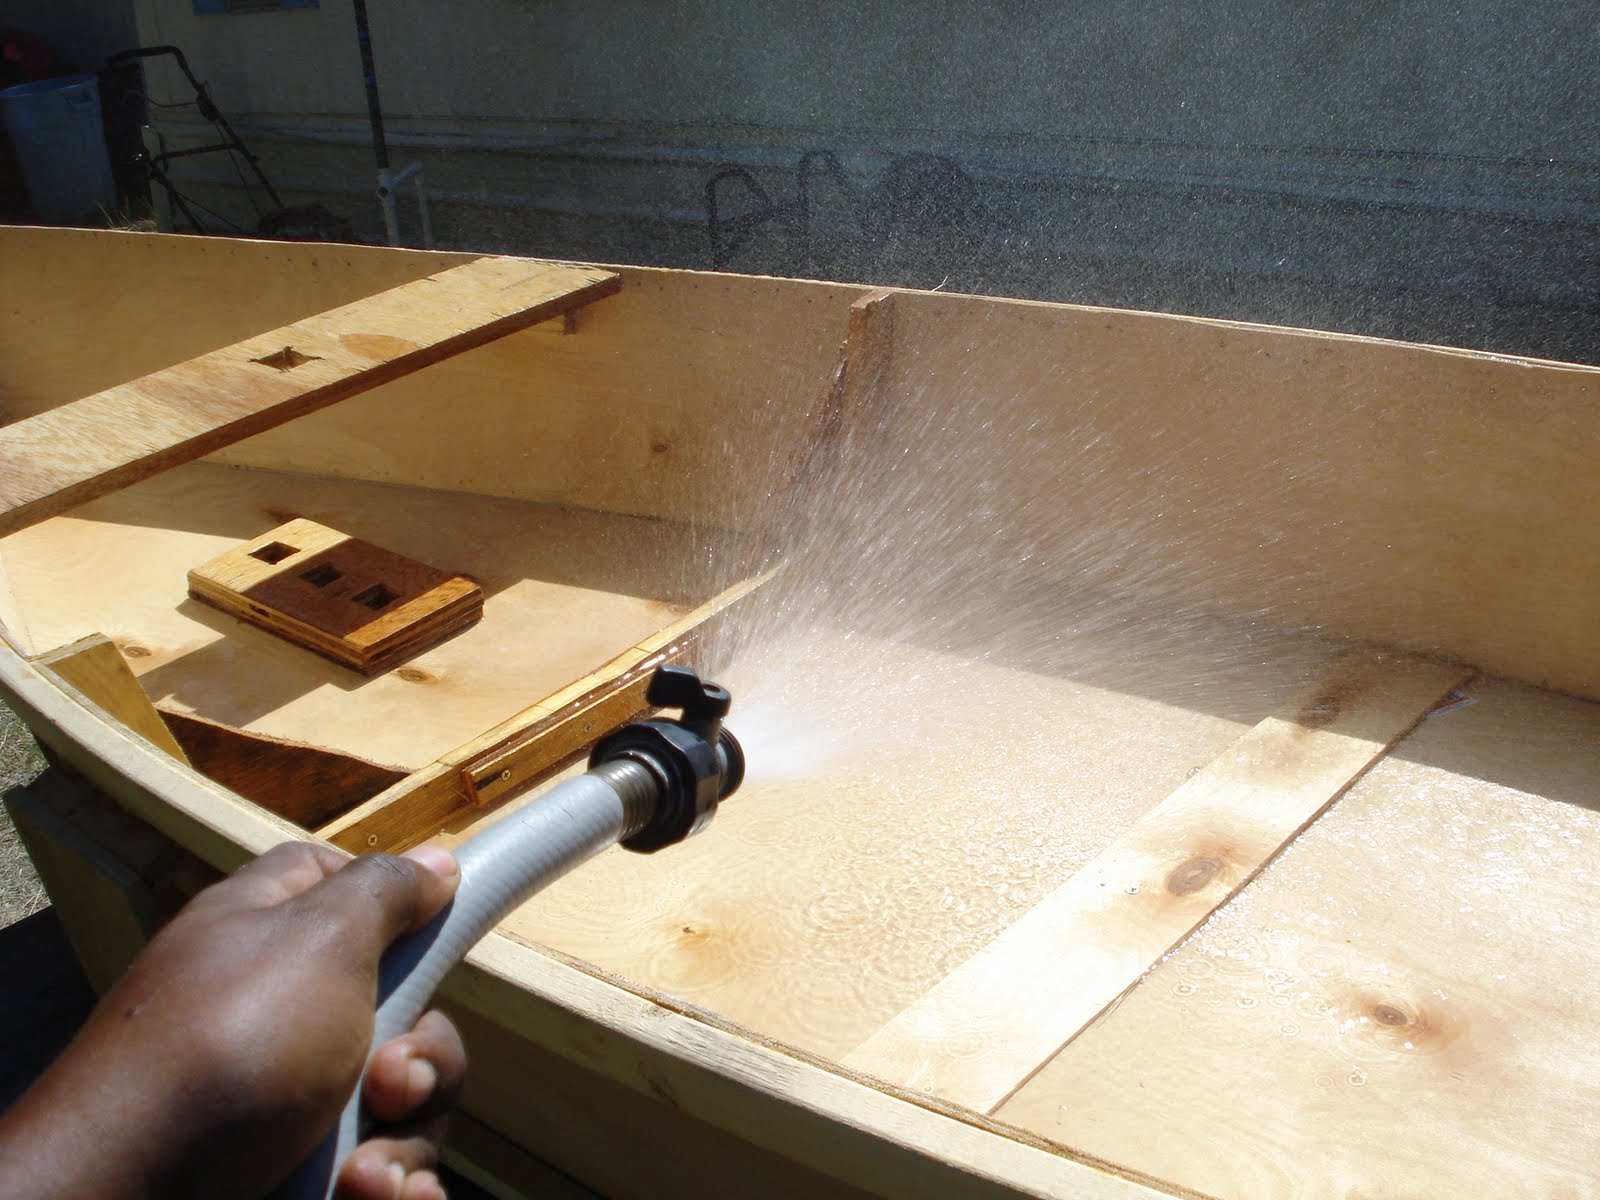
Once that was cut out twice and put in a vice grip to cure I decided it was time for the dreaded water test. That and I had nothing more I could do at this point.So I grabbed the garden hose and filled her up.
The good news is that if I was taking water over the bow at the rate of the hose and if the world were perfect I could bail fast enough to keep the water out. Of course she leaked. but nowhere near as bad as I had feared. It was mainly along the tops of the chines and along the bottom of the transom where the angle isn't the best. All easily fixed.
I think once she takes up a bit the leaks will slow down and or stop. I also plan on running a bead of DAP Roofing Sealant around the interior edges as an added barrier. But these leaks are at acceptable levels and sea trials are a go as soon as I have the rest of my bits done. Darn those bits!
The plan for the Cygnet calls for a whimsical duck shaped rudder. If I were to show up on a wharf in Hong Kong with a rudder like this I'd have the tar kicked outta me by wharf rats. A ducky rudder will simply not do. So I decided I'd make it like I have everything else, I'll guess.
First up was the top part of the folding rudder. I got a pencil and drew out what I think it will look like. Then I cut it out. Now I'm using 1/4" luann so I'll laminate it for a full 1/2".
If the lamination fails I'll simply these bits out of full 1/2" plywood and call it a day. With that sorted out it was on to the rudder. Yes, I am still fascinated by Titanic's rudder so I made one that looks like that. Much bigger and broader then my last one mind you.
![]() |
| That...looks about right. I think. |
![]() |
| Takes a lot of water to fill this small boat! |
I think once she takes up a bit the leaks will slow down and or stop. I also plan on running a bead of DAP Roofing Sealant around the interior edges as an added barrier. But these leaks are at acceptable levels and sea trials are a go as soon as I have the rest of my bits done. Darn those bits!
Tuesday, August 24, 2010
More and More Boatlike!
Not as much progress as I was hoping for today. I blame it on lack of good plywood. I have a loot of checking scrap lying around but for my leeboard and my rudder I'd just as soon use good plywood and only have to use it once. But on to today's progress!
First thing out of the gate was the leeboard support. I wasn't satisfied with what the plans called for, surprise surprise and I put the thought of a centerboard out of my head. I ended up following Andrew Linn's leeboard he used on his Harley 8a, a simple sideways table like set up. I cut them short, then had to cut them shorter. Then had gaps I'll use PL Premium to fill. But they seem to be sturdy and in the right place. That's what counts!
Looking over the plans and from what research I've done it appears I need about about 1 1/2sqft to get the proper leeboard to sail size ratio. I'm thinking I'll do the Michelak thing and do my boards out of laminated 1/4 ply for strength and straightness. With the support out of the way I grabbed an old skeg I had kicking around, cleaned it up with a jigsaw and attached it. Now lying upside down the S/V Sea Hawk looks like a boat lying upside down.
That is my favorite part of building a boat, watching these pieces of plywood come together into a form someone can recognize as a boat! And this is going to be my trim little racing privateer. I've decided on having a regatta during the WMHBBA messabout in September so this is going to be my best and only chance of winning! Sailing ability is going to be key in this boat and the ones that follow it. I want a boat that sails well in a good wind. I'm not so worried about slight and gusty winds but in a good stiff breeze I want to have a vessel answering it's helm and commander and allow me to worry about getting there and not if I will get there at all!
First thing out of the gate was the leeboard support. I wasn't satisfied with what the plans called for, surprise surprise and I put the thought of a centerboard out of my head. I ended up following Andrew Linn's leeboard he used on his Harley 8a, a simple sideways table like set up. I cut them short, then had to cut them shorter. Then had gaps I'll use PL Premium to fill. But they seem to be sturdy and in the right place. That's what counts!
Looking over the plans and from what research I've done it appears I need about about 1 1/2sqft to get the proper leeboard to sail size ratio. I'm thinking I'll do the Michelak thing and do my boards out of laminated 1/4 ply for strength and straightness. With the support out of the way I grabbed an old skeg I had kicking around, cleaned it up with a jigsaw and attached it. Now lying upside down the S/V Sea Hawk looks like a boat lying upside down.
That is my favorite part of building a boat, watching these pieces of plywood come together into a form someone can recognize as a boat! And this is going to be my trim little racing privateer. I've decided on having a regatta during the WMHBBA messabout in September so this is going to be my best and only chance of winning! Sailing ability is going to be key in this boat and the ones that follow it. I want a boat that sails well in a good wind. I'm not so worried about slight and gusty winds but in a good stiff breeze I want to have a vessel answering it's helm and commander and allow me to worry about getting there and not if I will get there at all!
Monday, August 23, 2010
Progress has Struck!
It was a busy day at the IP&NCo. fleet yards! The S/V Sea Hawk is nearing it's launch date, with luck this coming Sunday! How did we get here? Well with the help of some friends and lots of work, as all such things happen.
Last week I managed to snap one of the gunwales while putting it on. Note to self, start at the pointy end! So Sea Hawk was put on a brief hold while I helped The Typesetter work on his boat, the S/V Pica. He needed access to a table saw and my neighbor has one so he came over to use it. Turns out we had to dig it out of assorted clutter but in the end his 1x4x16 was turned into a beautiful set of gunwales for his teal. And since I had him over he helped me put on my chines. One of the issues was that all my tools are spread between his yard and mine and since I was visiting on a regular basis I sent Sea Hawk home with him figuring I could work on her next time I came over.
Later in the week we picked up a few 1x2's to be used as gunwales and soaked them over night. Adding water to cheap lumber really helps to assist it in making a curve! And on an 8' boat those curves can be pretty intense! Gunwales were applied as was the bottom. Because I put the frame in the wrong position I have a slightly curvier boat then the plans call for and the remaining luann sheet was not enough for the bottom. In my defense the plans are slightly confusing if you read them quickly. Okay that's not much of a defense but we had some more luann. Of course the sheet had been torn in half during a move but we know how to make a butt joint and it worked out perfectly!
I was out in the truck today so we swung by The Typesetters and picked up the boat. Then it was to work! The goal for today was get the mast in place. I'm following the build notes for the Cygnet so it's run inside, pull up the site, get a measurement, run back out and work. It should be noted that the OSS was not designed to take a sail rig, so there is not a whole lot of info out there on converting the boat to sail. But so far I think I'm doing alright.
According to the plans the mast partner is 26" behind the tip of the bow and the step has three settings for rake. I'm really pleased with how my mast step came out. It's just a scrap of 3/8" I had lying around with a 1/2" plate underneath it for reinforcement. But it looks clean and works quite well. The other rack positions are a bit superfluous as they don't work. But it looks cool! I'm still planing on adding some sides for a 'well' look to it. And if you are wondering, yes I made sure to add some money, in this case a 2007 Montana state quarter beneath the step.
With the partner and step in place I had to put the sail up! I cut it down about a foot to make the height the same as in the photo's of Cygnet. With a bit of finagling I got the sail working and went yard sailing. It worked perfectly! I was very pleased with it's performance and am sure if the boat doesn't sink, the COE is in the right place and the rudder works I'll have a sail boat.
And I leave you with a song. Yes, a song. I have a habit of singing sea chanteys when I work on a boat and got one stuck in my head and figured I'd record it. I'm not the best singer but neither were those who sang this when it was used for work. You'll also get a blurry tour of the boat. Enjoy!
What remains are what The Typesetter and myself call "The Bits". Rudder, leeboard, fit and finish. I'm contemplating doing Cunard colors with varnish in board. Should be a sharp little boat when I'm done. Looking forward to it.
Last week I managed to snap one of the gunwales while putting it on. Note to self, start at the pointy end! So Sea Hawk was put on a brief hold while I helped The Typesetter work on his boat, the S/V Pica. He needed access to a table saw and my neighbor has one so he came over to use it. Turns out we had to dig it out of assorted clutter but in the end his 1x4x16 was turned into a beautiful set of gunwales for his teal. And since I had him over he helped me put on my chines. One of the issues was that all my tools are spread between his yard and mine and since I was visiting on a regular basis I sent Sea Hawk home with him figuring I could work on her next time I came over.
![]() | |||||||
| Sea Hawk underway for the first time! |
I was out in the truck today so we swung by The Typesetters and picked up the boat. Then it was to work! The goal for today was get the mast in place. I'm following the build notes for the Cygnet so it's run inside, pull up the site, get a measurement, run back out and work. It should be noted that the OSS was not designed to take a sail rig, so there is not a whole lot of info out there on converting the boat to sail. But so far I think I'm doing alright.
![]() | |
| Mast partner and step |
With the partner and step in place I had to put the sail up! I cut it down about a foot to make the height the same as in the photo's of Cygnet. With a bit of finagling I got the sail working and went yard sailing. It worked perfectly! I was very pleased with it's performance and am sure if the boat doesn't sink, the COE is in the right place and the rudder works I'll have a sail boat.
And I leave you with a song. Yes, a song. I have a habit of singing sea chanteys when I work on a boat and got one stuck in my head and figured I'd record it. I'm not the best singer but neither were those who sang this when it was used for work. You'll also get a blurry tour of the boat. Enjoy!
What remains are what The Typesetter and myself call "The Bits". Rudder, leeboard, fit and finish. I'm contemplating doing Cunard colors with varnish in board. Should be a sharp little boat when I'm done. Looking forward to it.
Tuesday, August 10, 2010
Monday, August 09, 2010
One Sheet Skiff or...
I'm debating if OSS stands for One Sheet Skiff or One Sh*&#y Ship. The S/V Sea Hawk is now partially completed. It's been a hell of a day. It wasn't until after I started the build that I realized everything I need to do a quick build is over at the S/V Pica site. Great....well it's just an obstacle right? So I thundered on, I have a deadline to meet! Got the sides cut out and then dug right on in to the center frame. It was raining like crazy so I was in my neighbors shop. Got the frame finished and the rain stopped. Wandered next door and did a test fit. Hmmmm...something wasn't right. Made the frame 4 1/2" to long. No problem, took 2 1/4" inches out of each side and secured them back together.
Now the directions say to attach the stem first. This is the same general design as the Teal and the Mayfly 14 so I decided to warp the sides around the main frame. Turns out the work table I have isn't exactly flat. Well crap. Then I found out my Titebond I swore I had kicking around here wasn't to be found. So I used some Gorilla Wood Glue. We'll see how it turns out. But with lots and lots and lots of little nails I got the sides on the frame.She started looking like a boat so I was doing something right.
Found some decent 1/4 ply in the scrap heap and framed up the transom. Now here is the odd thing: The sides are 9" high but the transom is listed on the plans as 10 1/2" inches high. Oh well I followed the plans. Now it should be mentioned at this point I was beyond the point of no return, I was going to get as much done before dark as possible. Attached the transom and figured if it was wrong I could maybe..uh...we'll figure it out.
Now for the last part of the evening, the stem. Oh the stem. I have access to a table saw but it's not ready yet. So I had to use a jigsaw. Next time I'd rather nail my tongue to a cactus using a rusty Popsicle stick and a dull hammer then ever do that again. In the end it was a bloody inch short. Oh well looks fine from about fifteen feet away so why worry?. Slobbered some glue on it and with a few 3/4 screws got the stem installed.
Right now I'm sweaty and tired and need a shower. My throat and nose are full of sawdust and I itch. But have a good start on my boat. The OSS is a decent size and I would suggest anyone out there build it. But make sure you have everything you need first.
Tomorrow I plan on getting the gunwales and chines on to stiffen her up. Bottom will go on later in the week. This boat will be saved by PL Premium, God's gift to those who build cheap boats.
Now the directions say to attach the stem first. This is the same general design as the Teal and the Mayfly 14 so I decided to warp the sides around the main frame. Turns out the work table I have isn't exactly flat. Well crap. Then I found out my Titebond I swore I had kicking around here wasn't to be found. So I used some Gorilla Wood Glue. We'll see how it turns out. But with lots and lots and lots of little nails I got the sides on the frame.She started looking like a boat so I was doing something right.
Found some decent 1/4 ply in the scrap heap and framed up the transom. Now here is the odd thing: The sides are 9" high but the transom is listed on the plans as 10 1/2" inches high. Oh well I followed the plans. Now it should be mentioned at this point I was beyond the point of no return, I was going to get as much done before dark as possible. Attached the transom and figured if it was wrong I could maybe..uh...we'll figure it out.
Now for the last part of the evening, the stem. Oh the stem. I have access to a table saw but it's not ready yet. So I had to use a jigsaw. Next time I'd rather nail my tongue to a cactus using a rusty Popsicle stick and a dull hammer then ever do that again. In the end it was a bloody inch short. Oh well looks fine from about fifteen feet away so why worry?. Slobbered some glue on it and with a few 3/4 screws got the stem installed.
Right now I'm sweaty and tired and need a shower. My throat and nose are full of sawdust and I itch. But have a good start on my boat. The OSS is a decent size and I would suggest anyone out there build it. But make sure you have everything you need first.
![]() |
| Not to shabby, not to shabby at all. |
Saturday, August 07, 2010
Did I I Forget to Mention...
![]() | |
| My first spirit sail. 25 sq. ft. |
This is the best sail I've made so far. The shape is much, much better the then any of my previous sails. I don't get the wrinkles or folding at any of the edges when the wind hits it. Sail creation is not witchcraft it just takes some time and research. The sail was amazingly easy to put together and I see why it's a popular sail option for small boats. I need to figure out a better snotter (How cool is that? Snotter snotter snotter!) set up but the sail is done. In his book, Jim Michalak says to build the sail first. With that out of the way the only thing left to do is get the hull built.
![]() |
| And it even works! |
Needlessly Overcomplicating Things.....Again.....
Due to the fact I've not had a boat in a few weeks I feel the urge to build one. As Blue Flower is a long term project I've decided to knock out a Herb McLeod designed One Sheet Skiff with a sail rig to finish out the season and have a boat for the first WMHBBA messabout in September. The OSS is an amazing little craft. It was in fact the first boat I really wanted to build but it's 9" freeboard didn't seem to make much sense in the rough waters of the inland northwest. But my experiences on Lake Union have convinced me that it may yet hold some promise.
As we work on the build of the S/V Pica sail math and center of effort have taken center stage. Knowing that I want my OSS to have a sail I needed to see if anyone had done it before and save me the math. Someone had! Enter the Cygnent, a sailing version of the OSS mounting a 25 sq.ft spirit rig. Looking over the rig I thought "I can do this". So I set up the polytarp and did it!
This used to be the rain fly for a massive tent. Now it's sail material. The plan for the rig looked deceiving enough. There was ample direction. So I sketched the plan out and went to work. I didn't have a measuring device long enough for some of the edges, but with a simple string compass managed to get the lengths and angles close. Now I am a cheap, lazy, bastard at heart so when it talked about running rope around the edges I simply decide since I had grommets I'd use those. To cover the edges I decided to save time and not use the carpet tape as I have in the past. I simply ran duct tape down all the edges and called it good. Will it last? Long enough I think. If I really like how the skiff sails I'll simply make a better sail down the road.
As I've mentioned the plans call for a spirit rig. Well I'm not a fan. So after getting all the grommets in place and the mast cut down to size I was trying to figure out what to use for the spirit. And the more I looked at it the more "Gaff Rig" kept popping up in my head. Now Andrew Linn has a plan for a single halyard gaff set up. When I tried (and failed) to put a gaff rig on the Wawona I used this set up and it seemed to work fine. I still had my gaff jawed yard and thought, why not? So I may be working on the smallest gaff rigged vessel in all of the inland northwest. It may be needlessly over complicated but I like it. And if it doesn't work I'll sell it.
So here is the sail in all it's glory ready for a boat. Needs some tweaking but I have high hopes my gaff rigged OSS will be the hit of the 1st Annual Frenchtown Pond Messabout!
As we work on the build of the S/V Pica sail math and center of effort have taken center stage. Knowing that I want my OSS to have a sail I needed to see if anyone had done it before and save me the math. Someone had! Enter the Cygnent, a sailing version of the OSS mounting a 25 sq.ft spirit rig. Looking over the rig I thought "I can do this". So I set up the polytarp and did it!
![]() | ||||||||
| Huge tarp staked out and ready for cutting. |
As I've mentioned the plans call for a spirit rig. Well I'm not a fan. So after getting all the grommets in place and the mast cut down to size I was trying to figure out what to use for the spirit. And the more I looked at it the more "Gaff Rig" kept popping up in my head. Now Andrew Linn has a plan for a single halyard gaff set up. When I tried (and failed) to put a gaff rig on the Wawona I used this set up and it seemed to work fine. I still had my gaff jawed yard and thought, why not? So I may be working on the smallest gaff rigged vessel in all of the inland northwest. It may be needlessly over complicated but I like it. And if it doesn't work I'll sell it.
So here is the sail in all it's glory ready for a boat. Needs some tweaking but I have high hopes my gaff rigged OSS will be the hit of the 1st Annual Frenchtown Pond Messabout!
Subscribe to:
Posts (Atom)