Showing posts with label Rigging. Show all posts

Monday, March 25, 2019

Rigged and Getting Ready!

With Dan and The Typesetter. Rig is up!
 Day off of work and a full day of playing with the boat! We have snow in the forecast but today was in the mid-50's and just called for boat work. I pulled the FatCat2 around front and with Dan and The Typesetter supervising rigged the boat, bent the sail, and prepared for summer fun. Never mind my favorite sailing lake is still frozen over, the rig is on! Most things went back as I remembered but the tome The Cat Boat and How to Sail her from The Catboat Association was a great help.
 Our friend Bobbie came over and The Lady and I ordered some custom decal bling for the boat and will start the process of seeing if we can do some custom sail art as well. The boat is packed back away behind the house but she's a little closer to sail season. And so am I.

Rigged and almost ready!

Lines run and neat.
L-R Throat, Peak, Leech, 1st Reef

Can't think of a prettier profile!


Tuesday, March 19, 2019

Last Day of Winter

S/V Kat Boat in the sun for the first time in 2019
 It's the last day of Winter 2018 and work has begun for the season. With a final snowstorm spring is on the way. Sure we'll most likely have one more snow event but the temperatures are rising and even the flying insects are out. And as soon as I could I started work.
 As faithful readers will no doubt recall The Lady and I are headed to Port Townsend, Washington for the Pocket Yacht Palooza (And the following Crooza) this July. We've a long way to go a short time to get there as far as our future home away from home is concerned. But we take it one day at a time and it'll all get done with time to spare.
 I've done just a touch of work during the winter, adding a fold down chart table to the cabin. And I'll admit that the lack of ability to get things done has been driving me, and by proximity her, positively nuts. But I've wasted no time and so much done so far!
 First up was the rigging. It's been my plan to go to double purchase on both the throat and peak halyards. Thanks to my visit to the Beetle Cat I got a pretty good idea of how that would work.
Beetle Cat Halyards
 I had purchased 300' of quarter inch nylon for halyards, replacing the suitable but less then desirable line the craft had had purchase. It has served me well and I have had enough left over for new halyard set up. Of course I haven't put the mast up fully yet so both are rather long at this time.
 The light line that was in the lazy jacks needed replacement. The jacks on Kat Boat serve as topping lift as well and the stretch of the original line was not ideal. I used slightly thicker nylon as a replacement, remaking the system as a perfect copy using the original.
 The last rigging itemaccomplished was reworking the mainsheet, to very Beetlerific 'to the hand'  and traveler set up. The original set up let to the tiller and while very nice while cruising imparted drag and lack of feel. The nice thing is it's simply a matter of rerouting line in order to switch between the two depending on how I'm feeling on the day.
 In between all of this has been bailing and drying and sorting. The Lady is hard at work coming up with storage solutions and preping the cabin for our future trips. Thought is to be wet no later then April with the first Messabout set for May 18th at Finley Point State Park.
Work on a bright winter day
I posed a question over on The Catboat Association Facebook page about how to properly fly our national ensign. Now if you're up on your flag code as it pertains to sailboats, you'll know the point of honor on a gaff is not necessarily the highest point as one would thing. The proper display is at the peak (top) of the aftermost gaff. Now I heard on the page that flying the flag from the stern, as one may on a powerboat or marconi rig is perfectly acceptable. And many gaffers do. But one answer gave me what I needed. I ordered a grommet set and added a flag attachment to peak of my gaff. Now Old Glory will fly where the Good Lord and the Flag Code intended it too. Some traditions should be followed. 
That's better.
That's it for the time being. To really finish up I need to get to location where I can raise the mast. But seeing as we have four feet of melting snow everywhere, including my back lot, I can almost sail anywhere if I can get the boat off the trailer! I should be unthawed come this next weekend and I'm sure we'll have another round of updates. Winter has not been fun at all and this changing season is very welcomed. 
Happy Spring from me and us to your and yours!


Thursday, September 20, 2018

Preparing to Set Sail

Figuring out the reef points while The Typesetter looks on and porta-john makes wisecracks.
 Our 1,400 mile sojourn to pick up the boat has left both myself and The Lady in need of a rest from long distance travel. Sadly this time of much needed rest falls over our favorite medieval event of the the year. But the silver lining is a very relaxed pace to prepare the boat for her official debut on Saturday, October 6th at Finley Point State Park. And today was a day for doing just that.
 Where the boat currently resides it's impossible to raise the mast for boom and spar work. So it's off to find a suitable location to do that. Today was Thursday and like so many of those days The Typesetter and myself, joined by The Lady took in coffee and fiddled with the boat. As we got the rig up some rather startling peculiarities popped up.
 I've had the rig up before and the first thing I noticed was the mainsheet did not run free. There was an incredible amount of binding in the triple block set up and that was dangerous. I figured it was a combination of a mainsheet too long in the heat, sticky and stiff, and blocks at the wrong angle. I was sure right about the wrong angle. The entire boom has a pretty severe warp to it. This causes the block to bind the sheet on what would be starboard tack and leaving no cushion should a gust hit. I remember well how I fought the issue of binding in the Blue Flower and ended up changing that set up as well.
C'mon catboat! Let's do the twist!
 This would require some fixing. I was also looking at how to reef. And doing it at sea would be hazardous if not almost impossible. And sailing on Flathead that isn't an option. So jiffy reefing it would be. I have set this up on my Piccup Pram and it has proven to be quite successful. So off to a few neighnoring harbor stores to get the requisite parts.
The Typesetter lounging while parking lot sailing.

Happy skipper.
Shadow is a fine dog.
 First up was a new mainsheet. There is a Duckworks order coming soon that will include all line needed but with the splash fast approaching a new mainsheet is the minimum we'll need. With the boat I got a back of assorted blocks and I found I had enough swivel blocks to replace all but one. This drastically helped take that apprant warp out of the boom and combined with the new sheet the boom runs free.
Swivels all around
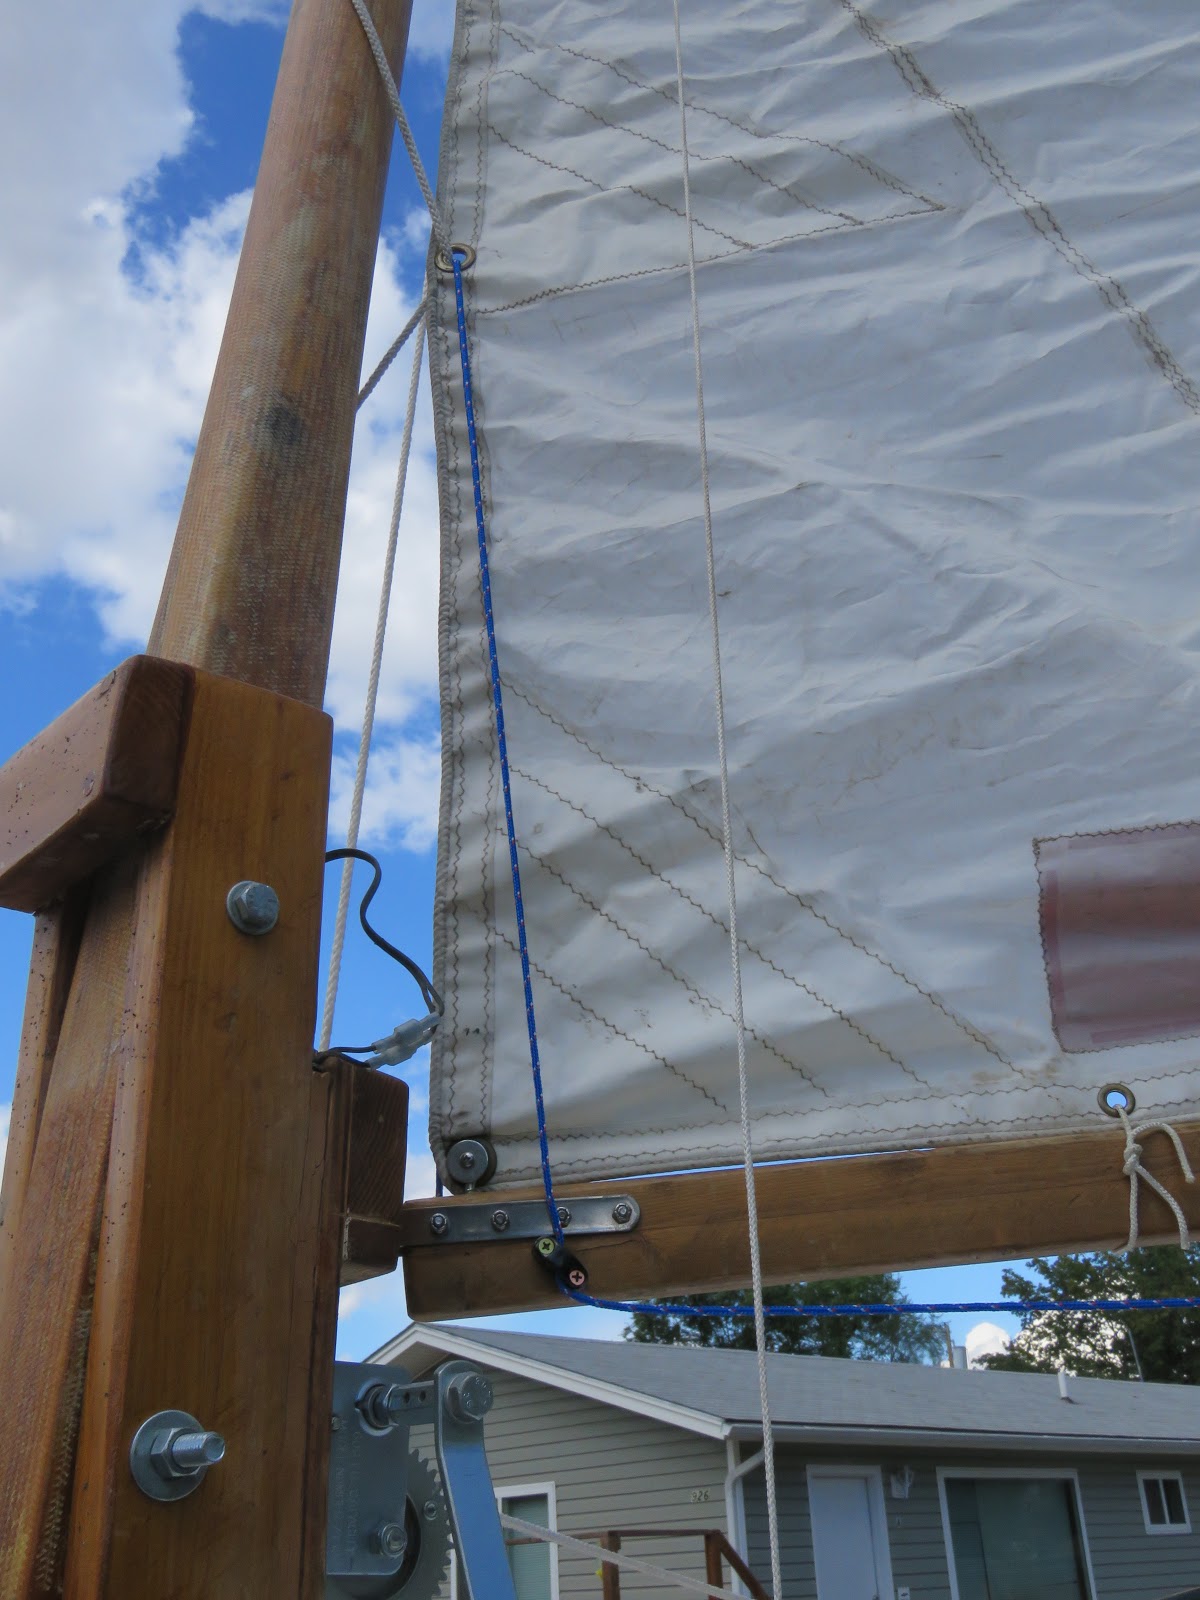
  Jiffy reefing was based on a diagram I found on Pinterest as well as my own experience. The corners were done with padeyes leading up to the reef grommets. Although there is some friction in the system subsequent testing has shown the validity and usability of the concept. We'll hit the water the ability to reef. And that is important.

The basics of the idea

Forward starboard
Forward poartside

With a the reef in.
  Those were the major things accomplished on the boat today. There where a few minor fixes, line replacement, tightening up the gaff outhaul with renewed line and ensuring other things were ship shape. The mainsheet aft padeye was also replaced with a smaller eye and a swivel block to help with the tension issue. Tomorrow the hope is to install a gaff bridle and a rope traveler at the stern. We'll have the option to sail with either depending on the weather. We splash in three days. And we'll be more then ready.
 Also sold the trailer that Lazy Shamrock was on to The Typesetter and included the boat. New adventures for both I'm sure!

Tuesday, April 18, 2017

Readying for Launch 2017

Just about as ready as we're going to get.
  Everyone knows that two days before you're going to do a shakedown cruise is the BEST time to do some major refits to your rigging, right? With the date looming where I may take someone else aboard my vessel I need to get things right now. So today was spent taking off and re-positioning hardware to better ensure success in that upcoming endeavor. I've never really been happy with my odd combination downhaul/boom vang set up. It's kind of like front wheel drive, both doing the steering and the breaking. Or in this case setting bottom sail tension and keeping the boom in check. After scouring the web and watching videos and looking at pictures of different set ups I decided trying to get a straight up downhaul in front of the mast was the best way to go.
Knew I'd find a way to re-purpose those blocks.
 In addition to the downhaul work the Typesetter noted I had no set-up to keep the boom and yard to the mast. So I went down to the local craft store and picked up some multi-colored beads with holes in them. Knowing were to find parrel beads locally is great. $.30 each sure beats $.75 plush shipping! I used some light line to attach them and now even when yard sailing the sail seems to be in much better trim.
Mast needs a coat of paint.

At the top of the mast, multi-colors!
  I also renewed the bungees that keep the hatch covers on. They had disintegrated after their six months of storage.
Should be good for another season.
  I have but a few more things to take care of before my hopeful splash on Thursday. Going to try and get some paint on the boat where I can. Provision it for a short sale. Double check everything I can. It's very much it's like prepping a eleven foot long space shuttle. This craft my father and I built will be the only thing that will help keep me safe as enter once more onto the deep blue. We know the theory, I know it floats, but it's still a whole lot of unknowns and yet-to-be-discovers. It doesn't come with the same feeling of reassurance that the Lido gives me. I just don't know it well and we've had a rocky relationship so far. But I have faith. Faith in the boat and it's designer, and that I know well enough to keep me out of trouble.
 The weather is the same on Thursday no matter were I look. Winds just below 10mph, 56 degrees and rain at 3pm. That's the forecast to the north of me (Flathead) and to the northeast (Salmon). Not sure yet where I plan on putting in. On one hand Polson would be quiet this early in the year although the ramp would be very long. Big Arm is a known quantity but perhaps a bit big for me in this boat at this time without other watercraft support. Salmon is nice but the winds can be quite shift at times due to the canyon location and the islands. I guess I'll wake up and see what I feel like.
 I guess there is nothing to do but finish the final checks and wait the 48 hours until launch. Fortune favors the prepared so that's all I can do.


Wednesday, September 05, 2012

Heading Towards the End

The IP&NCo. has plans for some big water sailing later in the week so work has been heavy these last few days. As I have eluded to in previous posts there are a few nagging issues with the rig that need immediate attention. I have a terrible habit of sailing by the lee. When I head dead downwind the boom sky's then snap jibes. It's a bit of a terrifying experience and not one I enjoy very much. So The Typesetter and I spent the better part of this past Tuesday figuring out how to keep the boom down. At the last sailing session he had jury rigged a quick fix that tamed the boom enough for sailing in moderate winds. But a more permanent solution was needed.
Being the guys we are about eighty percent of our day was spent making things way more complicated then they needed to be while buying parts we ended up not needing. Finally a design was decided on in ten minutes later we had the result.
Tension is maintained with the turnbuckle and it works quite well so far on land. The end result is the boat is now a bit safer and it increases the performance envelope of my boat. The improvement of sail shape, such as it is, is markedly improved. Or at least my sail girts are in the proper orientation now.
The sail itself is on it's last legs. They came with the boat and are the original sails as of August 2008. I've sailed holes in them. Andy has graciously offered to build some new sails.
We have some big water sailing scheduled later in this week and this time I'll be sure to have the camera. Tonight however they are forecasting wind and possible snow in the valley. Winter comes quickly in Western Montana. I've buttoned down the boat as best I can and made some hot cocoa.
I like how she looks like Nautilus from from the 50's Disney movie. One of my favorites! I leave you with a quick tour of the boat.

Tuesday, July 03, 2012

Demasted

S/V Blue Flower Gooseneck (Stolen from Sleeping Schnauzer)
 After an hours work the Blue Flowers rig has been taken off and stripped. I'm left with an upside down boat and a bag full of hardware. The masts, spars, bowsprit, tiller and trim are at The Typesetters for varnish. From what I can tell the wood has never been finished. I can't wait to see to see what she looks like when it's all done but I feel kinda empty with a partial boat out in the yard.
 I must admit I felt a little weird as I took apart the rig. This is what gives my boat her identity as a sailboat and is her only mode of propulsion. I did get to see a lot of the detail that went to the rig though. Most of the attachments are hand made and the nylon lock nut is the preferred fastener of choice. The spars and mast are surprisingly  light weight and easily transported. I'm unsure of the wood used but it's rather dense.
 Underneath the bow trim piece I found the other mast step, about a foot forward of the one I use now. Would give a jaunty catboat look and maybe open up the possibility for a mizzen but that's for another day.  I'm thinking that sandpaper may take off enough of the top coat to get rid of the white speckles that coat the starboard side of the boat. When this refit is done she'll take on more of the identity I'd like for my boat. She'll still turn heads no matter where she goes and that is important. What sailor doesn't want a good looking boat?
 So I'm out of the sailing game for a few days but I could use a break. I figured it's 24 miles to my pond one way. Last week I drove almost 200 miles going sailing. That's a lot of gas! I'm thinking of cutting it back to twice a week for the pond or once a week to bigger waters. Will it happen like that? I don't know but it's a good plan. I'm hoping to get The Typesetter and S/V Pica out on the water with me a few times. Always more fun to sail with friends.

Thursday, July 21, 2011

Little Details

Need some more line to finish this right but that looks pretty good.

Wednesday, July 20, 2011

Rigging S/ Blue Flower

  Awhile ago there was a rash of rigging posts on the wooden boat sailing blogsphere. Not to be left out  I posted one for the tiny sprit rig of S/V Trudy C. It was not impressive. But with a new boat and many stings to pull I figured I'd update my rigging post for those of you who may be interested.
  Blue Flower flies a gaff mainsail and a jib. The rig is fairly conventional but there are a few tweaks that the vessel has undergone that I'd like to point out.
  Here she sits on the trailer. You'll notice the mast is of a tabernacle design. This idea an design comes directly from the Stevenson Project's Weekender.
  How did a Bolger Teal end up with this mast you ask? The previous owner of the boat owns a Weekender with a gaff and many of the ideas were directly imported into this boat. The idea, and it's a sound one, is she is stored on the trailer ready to go.This makes rigging and de-rigging much less of a hassle! On with the trailer sailing!
  There is only one piece of standing rigging, a forestay. This balances the load with the dolphin knocker below. Simply pull the pin, put the mast up, make sure to put the pin back in and that bit is done.
   Then apply slight upward pressure on the bowsprit and hook the forestay into place.
 Now because the rigging of this boat is fairly self contained the rest is straight forward and simple. Simple if you follow the maxim "A place for every item and every item in it's place". With the mast up and forestay in place I check my halyards and sheets for twists or obvious binds. Below the mast partner is a belaying pin block. I'm sure there is a technical name for that but I've not learned it yet. If we look at it left to right the six pins are: Jib Halyard, Bungee Spot, Empty, Empty, Peak Halyard, Main Halyard. Jib comes up first with the sheet left loose but in place. The pins are under over, under, twist. And then coiled properly on the pin!

  And if people are in ear shot it's a rousing chanty to get the main and peak up together.
  Those are given good tension and a final check to make sure dagger board is down, rudder in place, cockpit clear and in good order. Then it's cast off and sheet home. But for this post my boat simply has her wings out on the trailer.
Total time to rig is about five to seven minutes. The fact it's all self contained is great for a single handed sailor. They say a boat the size of a Teal has limited utility. But I think the utility is what you make of it. Right now this boat for me is a sail trainer in the classical sense of the word. Training muscle memory, observation, and general seamanship in a handy easy to manage package. Now to get it on the water and work the rest!
A lot of people ask me if I were shipwrecked, and could only have one book, what would it be? I always say 'How to Build a Boat    Stephen Wright

Tuesday, September 21, 2010

Rigging my OSS

There have been a few blogs about rigging y our boat. One is here and another here. So I thought I'd post mine. My current rig is a 25sqft sprit rig. The sail is semi-permanently attached to the mast. So here is my rigging procedure, which is the same from shore or alongside the dock:
  1. Unfurl the sail
  2. Set the Sprit
  3. Step the Mast
  4. Go Sailing
Getting ready for port is even easier, simply unstep the mast , roll up the sail and store. I have been in talks with Dave over at Polysail and I think I'll have my next sail professionally made. The price is good and will make a good Christmas present to myself. May even go a bit bigger to 33sqft!