Showing posts with label OSS. Show all posts

Wednesday, February 16, 2011

Passion is the Fuel for The Fire of the Soul

It's still a pretty hard winter here in the Big Sky Country. But a short session at The Typesetters house has ignited the boat building passion once again and I thought it deserved a blog post. But I'll start at the beginning.
Once the cold and snow settled here I was set on my next boat. The eight foot PDR inspired Cabin Cruiser known as the Ocean Explorer (OE) by  Perttu Korhonen with technical assistance from Mik Storer. For those living under a rock for the last few years a PDR is a boxy boat with great performance and is in fact a racing class. The OE adds a cabin for one person camp cruising.

From Duckworks.com
It has a full set of Storer foil and rig plans and would out perform just about any other 8' camp cruiser or open sailboat on the water. I had been lusting after it after I saw it on Duckworks and decided to pull the trigger and order the plans. The plans alone were worth the money. It's all in metric and some of the measurements are carried out to a tenth of a millimeter.  But as I pored over the plans a bit of apprehension hit me.
I knew I could build this boat. But could I build the boat in the time frame I had set out this summer? The Western Montana Home Built Boat Association has a messabout scheduled for June 24th on the Mighty Flathead Lake. And I'm planning on attending the Center For Wooden Boats Home Built Boat Show in July sometime. So with the worst winter in years  I was looking at a shortened time line as I work outdoors.
Building a boat is not a big deal but the OE is a different kind of cat then I'm used to. There is lamination, curves galore and a fit and finish that while nice does not lend itself to a very quick build. If done to plan it would be rather expensive if done right and I'd need a trailer and a hitch to get it around.
So knowing my timeline I've been sweating the last few months on how I"m going to get the money to get all this done and then find the time. Or find the time and then the money. It simply wasn't coming together.
Part of the OE's appeal is the ability to sleep on it comfortably. Well as comfortable as you can get in an eight foot boat with a cabin on it. This would save me paying for a hotel room in Seattle.
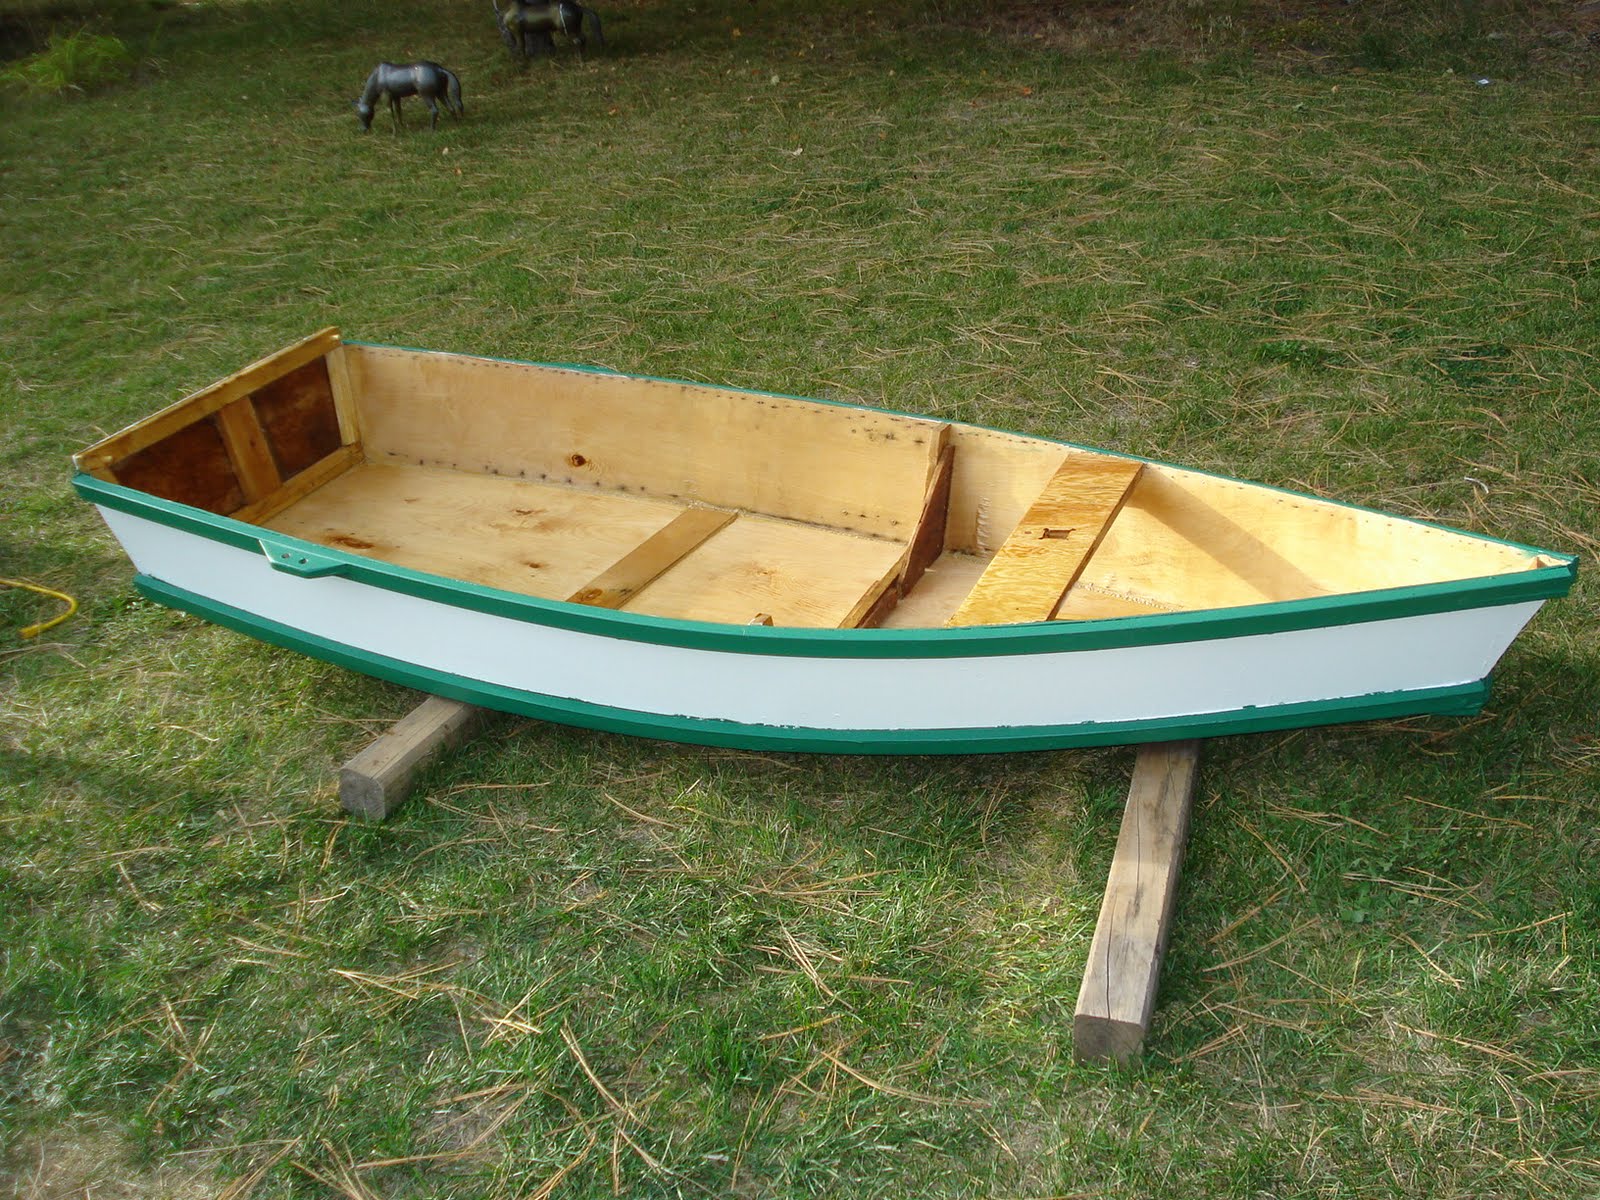
I finally decided I would simply throw my eight foot One Sheet Skiff Trudy C. on the roof of my 1970 Beetle and get it to Seattle. The boat is done and ready for a show, but I'd have to sleep in a hotel. Simple as that.
Enter a book. The Year of the Boat by Laurence W. Cheek. It chronicles  the build of a boat very much like the ones I've build and others that have been considered these long cold months. As I read it, skimmed it is more like it, I was returned in an instant to what building a wooden boat is all about. The fear. The trepidation. The hope and the unknown. And the urge to build a new boat hit me like a thunderbolt from the clear blue. I honestly was surprised. The last few weeks have been karate inspired and getting in shape and other martial goals. I had to get up in The Typesetters kitchen and pace. It was like electric energy and I had to satisfy it.
When starting this blog I laid out a series of considerations for my next boat. I'll put them up here.
  • The ability to carry more then one person safely and comfortably.
  • A proven design with a greater build history then the Harley 8. 
  • Enough room to sleep one in relative comfort, and if not carry the gear to allow it.
  • "Instant" construction using plywood.
  • Small car compatible, either on top or behind.
Those requirements have not changed. The plan a long time ago, at least in blog time, was to build a Michalak Mayfly 14. But that entered into trailer land and for the foreseeable future that is not going to happen. Enter the Summer Breeze by David Beebe. An 11' 8" Day Sailer based on the Bolger/Payson Teal.
The plans are free. She'll carry two without fuss and sleep one semi-comfortably. Good amount of freeboard and room for floatation boxes. Able to be car topped and built in the style I'm used to. Not only that I can get into a 3D hull in about $70.00 and take it to the nines if I'm financially capable. So there you have it. Once again my future boat has changed. And it may well change again. But I'm on a mission now. I'm planning on getting the lumber next month. I have a place for dry storage so I'm not too worried about buying it early.
There are a few things I want to do with this vessel I've not yet done but have been advised to do so. Chief among them is cap the top of the hull with the gunwales. That'll hopefully stop the checking issue that cheap Luann can be notorious for.
And I may yet build the OE. It looks like a well thought out, very capable boat. But I don't think it's the boat for me, right now. But I will have the plans if I get a wild idea as I'm known to. But I'd rather be sailing then building and I only have till June!
For all my readers I highly suggest The Year of the Boat. Boat Building is a madness but one I'm privileged to share with home boat builders across the world from every walk and avenue of life. So if you'll excuse me I have boats to go dream about and voyages to plan that are yet to be taken. Passion is the fuel for the fire of the soul. And it feels very, very good to be alive.

Tuesday, December 07, 2010

Life on the Hard is Sort of Boring

It has been awhile! It's deep winter here in Western Montana and all my boats are put away until next season. But I figured an update was due to you, the fine readers of this blog. All three of you.

OSS:

The One Sheet Skiff ended being named Trudy C.  and registered out of Mystic, Connecticut due to sentimental reasons. I just liked the idea of a work boat from days gone by and it seemed that a port on the east coast was fitting in that vein. Paint was "Leftover White" and trimmed in "Remaining Green" with three coats of marine varnish for the interior. The end result is a far cry from my first attempt at painting and I have a sharp looking little craft. On the water she's a decent boat, nothing to complain or write home about. The joints keep the water out, the sail sorta moves the boat and I'm happy when I'm on the water. Windward performance is still and issue but I think it'll sort it self out in time. The coolest thing is she is her own boat, no two ways about it. The best way to sail is in "rowing" position, that is feet so the stern back to the bow. And she likes a deep draw when you row. The rope oarlocks I made are holding up but will need replacing come next season  You can fit two but it's not a very safe proposition. But how much fun was building the boat? That makes it all worth it. And she'll make a fine dinghy for a larger boat someday.  At the end of the season I splurged and purchased a professionally made 25sqft sail from Dave over at polysail.com trimmed in green. It looks wonderful however we didn't have the wind for a full test. Currently the Trudy C. slumbers in the rafters of my mothers garage awaiting next season.


Fall Messabout:
The first official messabout from the WMHBBA was held on September 25th, 2010 at Frenchtown Pond State Park. It was lightly attended with just the usual suspects showing up. But a great time was had by all. We had boats in the water on time, food on the grill and a beautiful summer day. More importunately the S/V Pica was in top form for the event. I'll let Mike tell the main story on that but here are some shots of both boats enjoying a grand day out!
The next fall messabout is currently scheduled for September 25th, 2011. We hope to see you there!


Sailing Big Water:
The Typesetter and I sailed the mighty Flathead Lake right at the end of the season. It was an epic journey, worthy of Odysseus or maybe Jerry Springer. And again I'll let him tell the story as we took his boat. But I will say the cool thing about big water is when you're yelling at each other it doesn't carry that far.


Future Boat:
Right now the IPNCo. website is massively in need of an update in regards to my future plans. Originally it was to be a Mayfly 14. Then recently I got an option on a fiberglass boat. And now I'm building an Ocean Explorer. I've been busy!
First a quick recap of the Mayfly. I purchased Jim Michalak's wonderful book "Boat Building for Beginners" which has full plans for the Mayfly 14. It's a pretty boat with plenty of room and meeting my design criteria. I wold need a trailer but that's certainly not an insurmountable obstacle. So I was all fat and happy thinking that that was my next boat. I dreamed about it, thought up names and color schemes and waited until spring.
Throughout this process one thing I kept coming back to was the famous Puddle Duck. This is an eight foot box boat that can literally sails rings around just about anything shorter then it and quite a few boats longer then it.  There's been plenty of virtual ink spilled on the PD so I'll just say that it's a pretty common and increasingly popular boat. And I knew deep deep down I would have to build one at some point. But alas I had a 14' boat on my virtual ways and stuck to my guns. Then came the Ocean Explorer.
If you've learned anything about me reading this blog you'll know I love two things:
1.)Ridiculously Small Boats
2.)Ridiculously Small Boats That Try to Be Bigger Then They Are
My first boat, the S/V Wawona was just the first example of this trend. Keep those two things in mind reading the following sentence. The Ocean Explorer is a 8' Puddle Duck Cruising Micro Yacht. Yup, stake through the heart, it's my krpytonite, put a fork in me I'm done!
She'll sleep one internally, has a centerboard and is designed for the kind of off the beaten path, shallow water exploring I hope to do with a small boat. The designer, Perttu Korhonen in association with the indomitable Mik Storer drew up plans and I am hoping to order this for Christmas with building starting as soon as the snow melts.
But what about the glass boat you ask? Well it's a rather sordid tale. See I've had my 1970 VW Beetle in the shop for almost going on seven months. I swung by the shop to check on it's glacial progress and  my mechanic asked me if I was interested in his boat. This boat is a 12' day sailor of indeterminate origin on a trailer of even more questionable birth. I've looked it over before and filed it away as a possible purchase if the opportunity arose. It has arisen. He told me to come up with a figure and get back to me. Talked it over with The Typesetter and a few others and seeing as it's currently buried under six inches of snow, on tires not even on the rims, and needing Eywa knows how much work I decided that $200 was fair. He countered with "closer to $400" I countered with I'll get back to you. After much thought on the matter the boat simply didn't float. Not at that price. Or any price I would be willing to pay. Sure I could get it, find out that it's a rather easy boat to get back in shape and sail it all summer happy as a clam in my first production boat. Or I could discover it needs major work and I could try and mortgage the room I rent as it slowly hemorrhages money I don't have. Either way it's not MY boat. And that funnily enough is a very strange feeling.
The boats I've had so far, I've built them. I take the end result at face value because it was up to me to make them work. But no matter how this boat turned out it would be a boat I rebuilt, not a boat I made. And in my time in the wooden boat community I've been welcomed with warmth and shown the joy that is a wooden boat. Especially one you built yourself. So I've decided to pass on the production boat for the time being.


And that pretty much brings us up to date here in the IPNCo. I'll try and write a bit more often but it's tough in the off season. I will poke The Typesetter so maybe he'll update his blog and you can read about the trials and triumph that was our Flathead attempt (And success!). In the meantime, stay warm!

Tuesday, September 21, 2010

Rigging my OSS

There have been a few blogs about rigging y our boat. One is here and another here. So I thought I'd post mine. My current rig is a 25sqft sprit rig. The sail is semi-permanently attached to the mast. So here is my rigging procedure, which is the same from shore or alongside the dock:
  1. Unfurl the sail
  2. Set the Sprit
  3. Step the Mast
  4. Go Sailing
Getting ready for port is even easier, simply unstep the mast , roll up the sail and store. I have been in talks with Dave over at Polysail and I think I'll have my next sail professionally made. The price is good and will make a good Christmas present to myself. May even go a bit bigger to 33sqft!

Sunday, September 19, 2010

Everything I Learned About Painting

Everything I know about painting comes from two sources, Dynamite Payson and James May. Payson's Instant Boats is a veritable treasure trove of knowledge if you're willing to read it a couple of times. I think the biggest thing it's done is change how I paint. I used to b a 'dabber'. I'd dip my brush in maybe a quarter of the way into the can, wipe off the brush on the side of the can and wonder why it took so long. Now I dip it in half way, don't wipe and use long broad strokes. I as Payson says "get the paint on the boat!" The result speak for themselves. I"m not a yacht builder. I'm a small boat sailor. My goal at the end of the day is to have a boat I can sail. And if the finish isn't quite as good I can live with that.
From James May I got the direction to never let my brush leave the surface as I paint. This has had obvious effects on the people and environment around me! So far I have painted two boats.
S/V Wawona
Here is my first build with a paint scheme take directly from here namesake, the three masted schooner Wawona. The line between the "anti-fouling" paint and the hull came out well. The decals were custom done vinyl and although I may do it again in the future I need to find a way to seal them once applied.
And here for your consideration is the One Sheet Skiff! Not quite as clean as Wawona but with a solid "work boat" finish. The interior is varnished with three coats of Ace exterior varnish. I've got some paint smears and other minor issues but overall I'm terribly pleased! The transom has hand lettered name and port of registry. It looks VERY hand lettered. but if you were on a beach and needed to get your traps pulled what would it matter? The only thing missing is the IP&NCo. lettering on the bow.
All in all my painting has improved over time and I'm excited for my next build. With only a few minor bits to add I'll be ready for the messabout on Saturday. Then the ***** *. will be stored for the winter in a garage. And it's on to the next boat!

Tuesday, September 14, 2010

Epoxy and other Sticky Thoughs

Yesterday was spent adding some epoxy and fiberglass to the S/V Sea Hawk. The front of the chines were armored and  the bottom and transom coated in the sweet smelling concoction. Had I just painted the vessel I think I would have been fine with the Payson "two coats of each will do" to ensure the wood is protected. As the date of our first event of the year approaches it's been satisfying to watch the boats of the IP&NCo. come together.
I've secured indoor storage for the vessel over the winter which takes a load off my mind. The current issue of Wooden Boats has a great little supplement on winter layup and storage. It also has a great article on the joys of the dingy. Magazines like Wooden Boat, Small Craft Adviser and Good Old Boat act like seed catalog for us boaters during the the darker months. I enjoy curling up in one of the leather couches in our local library and going all over in my imagination as I look over the beautiful wooden boats and the far away places they sail. Following along as repairs are made and seeing other wooden boats that have been launched.
And as I have since the name change here is an older post.
Someone recently made a comment to me that sailing between far flung points on Flathead lake alone might get lonely. And that is exactly the point. To be alone and commune with nature and reflect on the moment at hand. It's just that I happen to be on the water when I do it. On the other side I can find fellowship and community while doing the same thing.
If I told people I was planning on hiking the Bob Marshall or the Appalachian Trail the looks might not be as bad. But I tell them I'm sailing six miles between campground and they think I'm looney. But the concept is the same. It's just a different manner of accomplishing the same goal. When people talk about sailing, the same may be said for boating. The draw is the same and the result can be very beneficial. It can be a form of exercise and is for many rather accessible.
Add on top of that a boat you built with your own two hands and it becomes unique. Going from raw material to finished product and then using that product must be a wonderful experience. The steps to the goal of sailing a home built boat encompass design, carpentry, naval architecture, elbow grease, seamanship and navigation, and imagination. Many who never new they could do some of these skills will find that not only are they within their grasp but that they enjoy it.
These are things I hope to explore over the next few months. And if you're reading this, you might to.

Sunday, September 05, 2010

She'll Make a Fine Rowboat!

We had gorgeous wind today. From the west at around 7-10mph. So naturally I went sailing! I fixed the rudder last night in preparation. It was chilly on the pond today I'd say WMO sea state 2. Now this may not SEEM like much but it was a lot for this new sailor and this new boat.
 I was a little concerned but bravely struck out from the shore. And snapped the tiller. Land ho!
Turns out I could steer with my hand on the top of the rudder so that is what I did. And dang it, I WENT SAILING! First was a very quick reach across the pond. Sailing with a boomless rig is different and will take some getting used to. I would like to keep my weight balanced but hanging on to the end of the sail puts me farther back then I'd like. Trying to get close hauled I'm having to hike out while IN the boat. Sounds odd I know and let me tell you it feels it. But let me tell you this boat SAILS. Maybe not as well as I'd like or hope but she will move upwind and reach and run like a banshee. And she'll pound your teeth out in a chop. I have a few more rudder issues to work out but I can say this boat gybes very well. As the wind comes around the wide beam of the boat helps to keep her on an even keel. But it was a learning experience and here is what I've learned so far
  • MAKE OARS!!! She paddles well but as a rowboat she'll really shine. 
  • Accept the fact that as a sailboat she may always just be a fair to middling performer.
  • Figure out a better way to get the sail close hauled so I'm not stretched out towards the stern
  • Leeboard position is huge on this boat. You can feel it when you put the board down and she straightens up. 
I have no idea how well it all went didn't get the GPS set up as sailing is still a fairly full time job for me, still learning don'tcha know ;) but she sailed as well as I could have expected. Save for the freeboard it's a fine little boat. I'm pleased with this build but I'm hungering for more. But here is a video of the S/V Sea Hawk heading upwind.
 I think to make a proper lady of her I need to get some oars on her. In the end I was wet and tired. But it was a good day!

Friday, September 03, 2010

She Sails! Er...paddles!

After a whirlwind morning it is my honor to say that the S/V Sea Hawk was launched to much success today. This was a "soft" launching so the normal page and a half script for the naming ceremony was not used.
"I christen thee Sea Hawk! May God bless her and all who sail her!"
Formalities done it was into the water. There were very few leaks and after a few minutes she stopped leaking. There was NO wind at all. But a wise man says "Sometimes you have to paddle to find the wind", so paddle I did!
This boat is amazing. Okay maybe not amazing to some but compared to my first effort this is a far better craft! The hull is for a better word slippery. Rowing is a breeze and if I got my numbers right the sailing should be good. The keel and skeg really help to keep directional harmony and it shows in the rowing and general tracking. A wise man also say "If you can't find the wind, take a nap". This boat lightly loaded has plenty of room to lie down!
With no wind I decided to let The Typesetter have a go. And wouldn't ya know it, I broke my rudder! It should be noted the entire rudder assembly is overbuilt to an amazing degree. Lots of through bolts and a big heavy tiller. This thing is massive thanks to my little "incident" on Lake Union this summer. Turns out the rudder is fine but the tiller/rudder joint was weak.
Snapped right at the bolt. *Shrugs* Easy fix and a lesson learned I guess. The bungee works great to keep the rudder down and it'll be up and running soon. So Mike took a spin. Even with low freeboard the boat handled it well.
 And I finished the day by looking for a geocache using my GPS and my skiff.
All in all I'm very pleased. The boat is stable, paddles well, not much more to say. I just hope for some wind on Sunday!

Sunday, August 29, 2010

Little Bit O' Work

It was a relatively short and quite day. Experimented with a boom on my spirit sail. Excessive boom rise but I'll keep at it. I do like the spirit sail for it's simplicity and ease of set up. One thing I need to remember is this is a SMALL boat and should be treated as such. I draw inspiration from the Ensigns Gig a two sheeter I found at Duck Works. I am a patriot. So today I raised Old Glory above the deck of the S/V Sea Hawk.
This means my sail will no longer be stored outside as the flag is permanently attached to the sail. Well as permanent as duct tape. No tape on the flag though! I also spruced up the mast step a bit.
Now is the time for the dreaded bits and painting. I'll be varnishing the inside for a more traditional look and I'm excited to get that started. But I'm off to Idaho for a few days so I'll be boat free for a bit.

Wednesday, August 25, 2010

Es hält Wasser von Gott!!!

S/V Sea Hawk does indeed hold water! But we'll get to that in a second. The hardest part of building a boat is the very end. Where all the bits are going on and it's tough to find a direction to go in. My way of getting past this is to work on the boat until decent progress is made every morning. And I have fulfilled that requirement for today.
The plan for the Cygnet calls for a whimsical duck shaped rudder. If I were to show up on a wharf in Hong Kong with a rudder like this I'd have the tar kicked outta me by wharf rats. A ducky rudder will simply not do. So I decided I'd make it like I have everything else, I'll guess.
First up was the top part of the folding rudder. I got a pencil and drew out what I think it will look like. Then I cut it out. Now I'm using 1/4" luann so I'll laminate it for a full 1/2".
 If the lamination fails I'll simply these bits out of full 1/2" plywood and call it a day. With that sorted out it was on to the rudder. Yes, I am still fascinated by Titanic's rudder so I made one that looks like that. Much bigger and broader then my last one mind you.
That...looks about right. I think.
Once that was cut out twice and put in a vice grip to cure I decided it was time for the dreaded water test. That and I had nothing more I could do at this point.So I grabbed the garden hose and filled her up.
Takes a lot of water to fill this small boat!
 The good news is that if I was taking water over the bow at the rate of the hose and if the world were perfect I could bail fast enough to keep the water out. Of course she leaked. but nowhere near as bad as I had feared. It was mainly along the tops of the chines and along the bottom of the transom where the angle isn't the best. All easily fixed.


  I think once she takes up a bit the leaks will slow down and or stop. I also plan on running a bead of DAP Roofing Sealant around the interior edges as an added barrier. But these leaks are at acceptable levels and sea trials are a go as soon as I have the rest of my bits done. Darn those bits!

Tuesday, August 24, 2010

More and More Boatlike!

Not as much progress as I was hoping for today. I blame it on lack of good plywood. I have a loot of checking scrap lying around but for my leeboard and my rudder I'd just as soon use good plywood and only have to use it once. But on to today's progress!
First thing out of the gate was the leeboard support. I wasn't satisfied with what the plans called for, surprise surprise and I put the thought of a centerboard out of my head. I ended up following Andrew Linn's leeboard he used on his Harley 8a, a simple sideways table like set up. I cut them short, then had to cut them shorter. Then had gaps I'll use PL Premium to fill. But they seem to be sturdy and in the right place. That's what counts!
Looking over the plans and from what research I've done it appears I need about about 1 1/2sqft to get the proper leeboard to sail size ratio. I'm thinking I'll do the Michelak thing and do my boards out of laminated 1/4 ply for strength and straightness. With the support out of the way I grabbed an old skeg I had kicking around, cleaned it up with a jigsaw and attached it. Now lying upside down the S/V Sea Hawk looks like a boat lying upside down.
 That is my favorite part of building a boat, watching these pieces of plywood come together into a form someone can recognize as a boat! And this is going to be my trim little racing privateer. I've decided on having a regatta during the WMHBBA messabout in September so this is going to be my best and only chance of winning! Sailing ability is going to be key in this boat and the ones that follow it. I want a boat that sails well in a good wind. I'm not so worried about slight and gusty winds but in a good stiff breeze I want to have a vessel answering it's helm and commander and allow me to worry about getting there and not if I will get there at all!

Monday, August 23, 2010

Progress has Struck!

It was a busy day at the IP&NCo. fleet yards! The S/V Sea Hawk is nearing it's launch date, with luck this coming Sunday! How did we get here? Well with the help of some friends and lots of work, as all such things happen.
Last week I managed to snap one of the gunwales while putting it on. Note to self, start at the pointy end! So Sea Hawk was put on a brief hold while I helped The Typesetter work on his boat, the S/V Pica. He needed access to a table saw and my neighbor has one so he came over to use it. Turns out we had to dig it out of assorted clutter but in the end his 1x4x16 was turned into a beautiful set of gunwales for his teal. And since I had him over he helped me put on my chines. One of the issues was that all my tools are spread between his yard and mine and since I was visiting on a regular basis I sent Sea Hawk home with him figuring I could work on her next time I came over.
Sea Hawk underway for the first time!

Later in the week we picked up a few 1x2's to be used as gunwales and soaked them over night. Adding water to cheap lumber really helps to assist it in making a curve! And on an 8' boat those curves can be pretty intense! Gunwales were applied as was the bottom. Because I put the frame in the wrong position I have a slightly curvier boat then the plans call for and the remaining luann sheet was not enough for the bottom. In my defense the plans are slightly confusing if you read them quickly. Okay that's not much of a defense but we had some more luann. Of course the sheet had been torn in half during a move but we know how to make a butt joint and it worked out perfectly!
I was out in the truck today so we swung by The Typesetters and picked up the boat. Then it was to work! The goal for today was get the mast in place. I'm following the build notes for the Cygnet so it's run inside, pull up the site, get a measurement, run back out and work. It should be noted that the OSS was not designed to take a sail rig, so there is not a whole lot of info out there on converting the boat to sail. But so far I think I'm doing alright.
Mast partner and step
 According to the plans the mast partner is 26" behind the tip of the bow and the step has three settings for rake. I'm really pleased with how my mast step came out. It's just a scrap of 3/8" I had lying around with a 1/2" plate underneath it for reinforcement. But it looks clean and works quite well. The other rack positions are a bit superfluous as they don't work. But it looks cool! I'm still planing on adding some sides for a 'well' look to it. And if you are wondering, yes I made sure to add some money, in this case a 2007 Montana state quarter beneath the step.
With the partner and step in place I had to put the sail up! I cut it down about a foot to make the height the same as in the photo's of Cygnet. With a bit of finagling I got the sail working and went yard sailing. It worked perfectly! I was very pleased with it's performance and am sure if the boat doesn't sink, the COE is in the right place and the rudder works I'll have a sail boat.
And I leave you with a song. Yes, a song. I have a habit of singing sea chanteys when I work on a boat and got one stuck in my head and figured I'd record it. I'm not the best singer but neither were those who sang this when it was used for work. You'll also get a blurry tour of the boat. Enjoy!
What remains are what The Typesetter and myself call "The Bits". Rudder, leeboard, fit and finish. I'm contemplating doing Cunard colors with varnish in board. Should be a sharp little boat when I'm done. Looking forward to it.

Monday, August 09, 2010

One Sheet Skiff or...

I'm debating if OSS stands for One Sheet Skiff or One Sh*&#y Ship. The S/V Sea Hawk is now partially completed. It's been a hell of a day. It wasn't until after I started the build that I realized everything I need to do a quick build is over at the S/V Pica site. Great....well it's just an obstacle right? So I thundered on, I have a deadline to meet! Got the sides cut out and then dug right on in to the center frame. It was raining like crazy so I was in my neighbors shop. Got the frame finished and the rain stopped. Wandered next door and did a test fit. Hmmmm...something wasn't right. Made the frame 4 1/2" to long. No problem, took 2 1/4" inches out of each side and secured them back together.
Now the directions say to attach the stem first. This is the same general design as the Teal and the Mayfly 14 so I decided to warp the sides around the main frame. Turns out the work table I have isn't exactly flat. Well crap. Then I found out my Titebond I swore I had kicking around here wasn't to be found. So I used some Gorilla Wood Glue. We'll see how it turns out. But with lots and lots and lots of little nails I got the sides on the frame.She started  looking like a boat so I was doing something right.
Found some decent 1/4 ply in the scrap heap and framed up the transom. Now here is the odd thing: The sides are 9" high but the transom is listed on the plans as 10 1/2" inches high. Oh well I followed the plans. Now it should be mentioned at this point I was beyond the point of no return, I was going to get as much done before dark as possible. Attached the transom and figured if it was wrong I could maybe..uh...we'll figure it out.
Now for the last part of the evening, the stem. Oh the stem. I have access to a table saw but it's not ready yet. So I had to use a jigsaw. Next time I'd rather nail my tongue to a cactus using a rusty Popsicle stick and a dull hammer then ever do that again. In the end it was a bloody inch short. Oh well looks fine from about fifteen feet away so why worry?. Slobbered some glue on it and with a few 3/4 screws got the stem installed.
Right now I'm sweaty and tired and need a shower. My throat and nose are full of sawdust and I itch. But  have a good start on my boat. The OSS is a decent size and I would suggest anyone out there build it. But make sure you have everything you need first.
Not to shabby, not to shabby at all.
Tomorrow I plan on getting the gunwales and chines on to stiffen her up. Bottom will go on later in the week. This boat will be saved by PL Premium, God's gift to those who build cheap boats.

Saturday, August 07, 2010

Needlessly Overcomplicating Things.....Again.....

Due to the fact I've not had a boat in a few weeks I feel the urge to build one. As Blue Flower is a long term project I've decided to knock out a Herb McLeod designed One Sheet Skiff with a sail rig to finish out the season and have a boat for the first WMHBBA messabout in September. The OSS is an amazing little craft. It was in fact the first boat I really wanted to build but it's 9" freeboard didn't seem to make much sense in the rough waters of the inland northwest. But my experiences on Lake Union have convinced me that it may yet hold some promise.
As we work on the build of the S/V Pica sail math and center of effort have taken center stage. Knowing that I want my OSS to have a sail I needed to see if anyone had done it before and save me the math. Someone had! Enter the Cygnent, a sailing version of the OSS mounting a 25 sq.ft spirit rig. Looking over the rig I thought "I can do this". So I set up the polytarp and did it!
Huge tarp staked out and ready for cutting.


This used to be the rain fly for a massive tent. Now it's sail material. The plan for the rig looked deceiving enough. There was ample direction. So I sketched the plan out and went to work. I didn't have a measuring device long enough for some of the edges, but with a simple string compass managed to get the lengths and angles close. Now I am a cheap, lazy, bastard at heart so when it talked about running rope around the edges I simply decide since I had grommets I'd use those. To cover the edges I decided to save time and not use the carpet tape as I have in the past. I simply ran duct tape down all the edges and called it good. Will it last? Long enough I think. If I really like how the skiff sails I'll simply make a better sail down the road.
As I've mentioned the plans call for a spirit rig. Well I'm not a fan. So after getting all the grommets in place and the mast cut down to size I was trying to figure out what to use for the spirit. And the more I looked at it the more "Gaff Rig" kept popping up in my head. Now Andrew Linn has a plan for a single halyard gaff set up. When I tried (and failed) to put a gaff rig on the Wawona I used this set up and it seemed to work fine. I still had my gaff jawed yard and thought, why not? So I may be working on the smallest gaff rigged vessel in all of the inland northwest. It may be needlessly over complicated but I like it. And if it doesn't work I'll sell it.
So here is the sail in all it's glory ready for a boat. Needs some tweaking but I have high hopes my gaff rigged OSS will be the hit of the 1st Annual Frenchtown Pond Messabout!